Project by KC8VWM
rewritten on permission WI2D - Andrey
Clothesline antenna
WI2D - Andrey
I have built a dipole of adjustable length similar to one described by KC8VWM. However, an insulated wire was used instead. Understanding that this approach creates coils at the end of each dipole leg, I am now debating whether I should strip the insulation. This way different turns of the wire on the reel will be in contact with each other eliminating the coil. Commercial 'Yo-Yo' variant of this antenna with insulated wire marketed by hamradiofun.com. Should I worry about described coils and strip the insulation?
Answer KC8VWM
Since it's my portable antenna design you are constructing, I suppose I might be able to answer your question how it works When you unroll the wire from the reel, it changes resonance in terms of it's operating frequency.
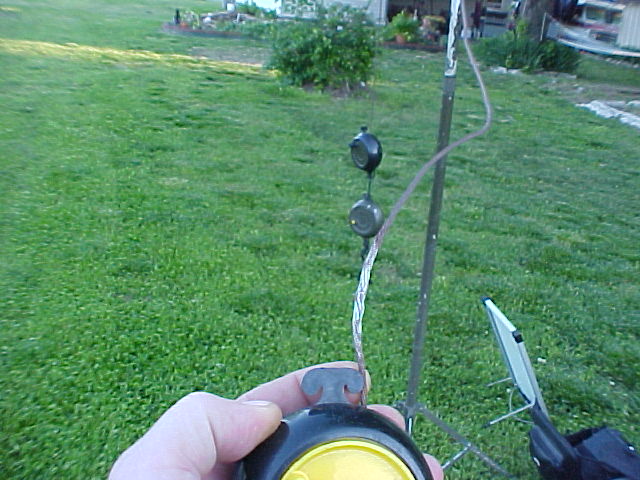
This is the tuning aspect of this design. You will not require an antenna tuner to work every band from 40 - 6m using this antenna. The wire left inside the reel is really just a "metal ball" which exists at the end of the wire. This "ball" is similar to the one installed on the end of your car antenna. Bare wire works best for this project because the wire ball inside the camping reels becomes a resonant part of the actual antenna design. It is because of that fact insulated wire will not work for this design. You need to include the "metal ball" inside as it extends to the rear of the reel as it's a functional part of the actual antenna length.
Design Instructions:
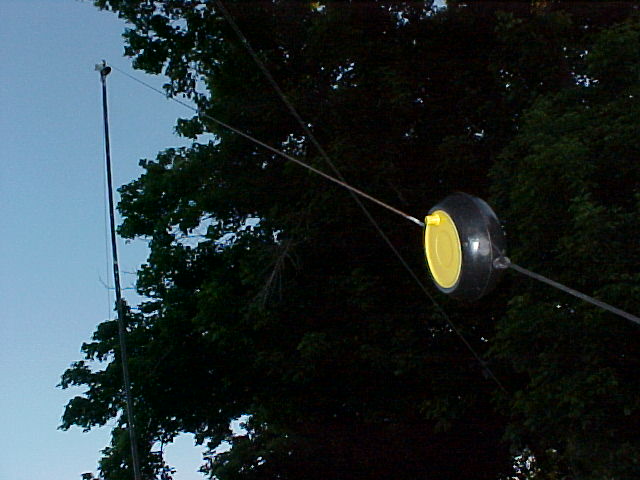
First, start out by designing the entire wire antenna to function on 40m as an ordinary dipole. (around 32' 11' when fully extended from the reels) 14 gauge flexweave is used in this design however "thinner" wire may be used. Stranded is typically better than solid wire because it's usually mechanically stronger and resists kinking etc. Once we design a 40 m dipole, next, we want to reel in just the right amount of wire for it to reach and function on the 30m band. For example, since we know a 40m dipole is 32' 11" and if a 30m dipole is 23' 2" long, then we simply subtract the difference and that's where the 30m band will be located on the wire. (subtract around 8' 9" +/- ) Next, check and tweak for best VSWR on the 30m band by adjusting the wire a few inches +/- in or out of the reels on both sides of the dipole until the best VSWR has been achieved at the desired operating frequency. Next use a paint marker, to mark that spot on each side of the dipole at the point it folds over the tab on the end of the reel for future reference. (see photo below) Now "tune" the antenna again but do this calculation for the next band when going from 30m to 20m. For exmple, to adjust the antenna from 20m to 17m all you need to do is calculate the differences in terms of wire length required between the next two bands in order to find how much wire needs to be reeled up inside. (subtracted.)
For example
If one leg of a dipole cut for 20m CW portion of the band is:
16' 7" long and if
One leg of a dipole for 17m CW portion of the band is
12" 11" long
And if the antenna has a good VSWR reading on the previous band, then collapse the wire inside the reel exactly 4' 2" and that will
be the difference between operating on 20m to 17 meters.
Once you have done that, check the VSWR again, (tweak the wire length and inch in or out of the reel if necessary) and now mark that spot
on the antenna wire using the paint marker.
Lather, rinse, repeat. Do the same thing above but for changing bands from 17 to 15 meters. Next you adjust and mark the wire going from 15 to 12m 12 to 10m and so on... Complete the calculations and wire marking procedure on every band until you have markings on your roll up antenna wire for every band from 40m though 6 meters. You can also include and mark it for 2 meters if you like! Now to operate on a regular basis using ONE high performance and lightweight portable antenna for every amateur radio band from 40 - 2m AND without requiring any tuner, all you need to do is count how many wire marks it takes to operate on a particular band. For 40 meter operation, you simply unroll all the wire from the entire reel. (no paint marks required) 30 meters = 1 paint mark on each side of the dipole 20 m = #2 paint mark 17m = #3 paint mark 15m = #4 paint mark etc etc.. It's just that easy
Answer WI2D - Andrey
sing bare wire was exactly my intent. But because I could not find thin stranded buss wire I went with the insulated one. The sleek Teflon insulation makes the wire convenient to work with and protects its strands from being separated and broken. Looking at it now I am wondering is it really worth it to strip the insulation? Unless there is a good advice against stripping, I will do it just to remove the doubt. At the end, worn out wire is easy to replace.
Answer KC8VWM
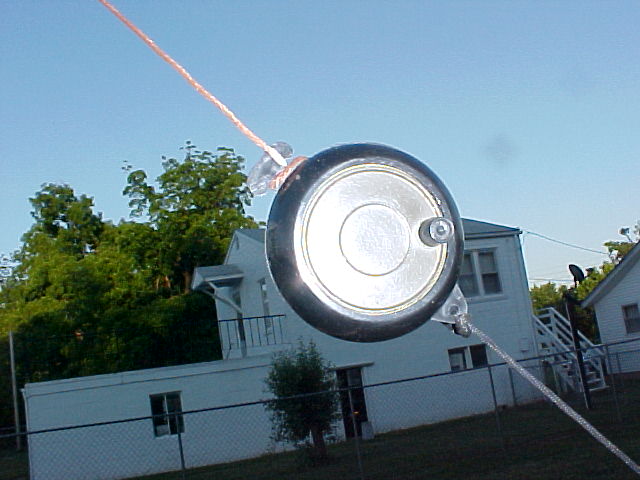
Yes, any wire you have available will do the job just as long as it's bare. Insulation means the wire is thicker in terms of limiting how much wire can be stuffed into the reels. So basically, more bare wire will go inside the reels without any difficulty. To make the "knot" on the inside of the reel to keep the wire from slipping off the end of the reel when fully extended, simply twist the end of the wire on the inside of the reel around a #6 nut and solder. Another tip, place a smudge of white lithium grease along the "friction points" on the inside of the camping reels. This is located between the outer "track" edge of the inner spinning yellow reel and the outer shell it rides along. This helps ensure the reels will always function with ease.
Answer LA3AKA
It shouldn't make any big difference between using insulated or stripped wire for this kind of antenna. since the inductor is at the end of the antenna it has very little effect on the resonance frequency of the antenna. The length of the antenna might be a little bit shorter with isolated wire due to the velocity factor for isolated wire (3-4% depending of thickness of wire and isolation and type of isolation), but this should not cause any problem as you can adjust the length very easy. If you can fit enough wire inside the reel without stripping off the insulation, I would not bother doing it.
the antenna is fed (powered) at it's feedpoin
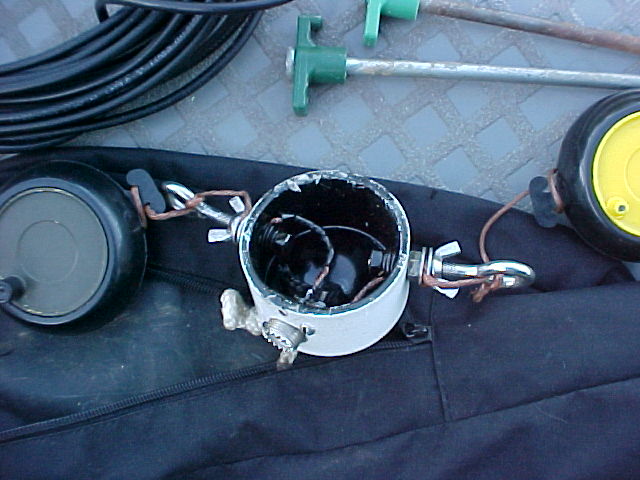
This is a typical hardware store schedule 40 - 2” PVC cap with stainless steel eye screws attached on each side. The S0-239 connector is installed as illustrated.
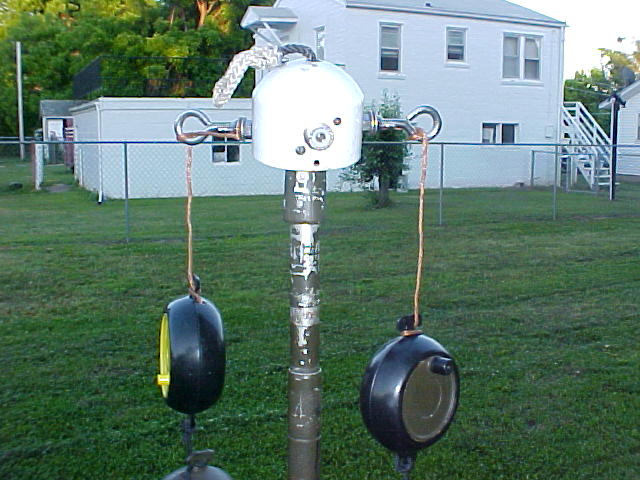
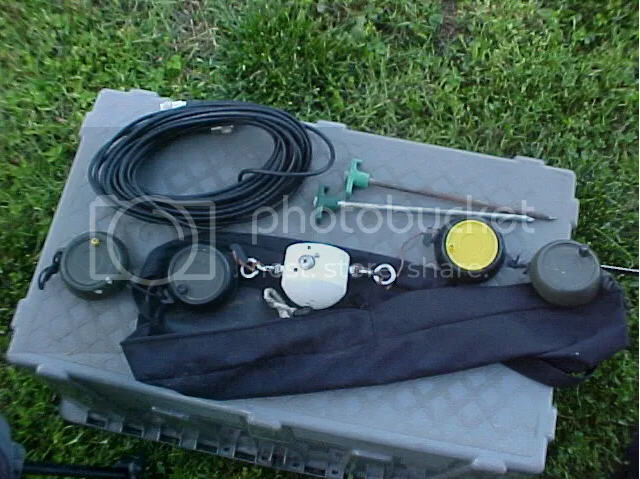
Portable lightweight multiband antenna system. Everything fits inside this nylon zip up bag. Including the LMR-200 feedline!